
Learn how to easily insert page numbers into the top or bottom page margins of your Microsoft Word 365 documents with this tutorial.
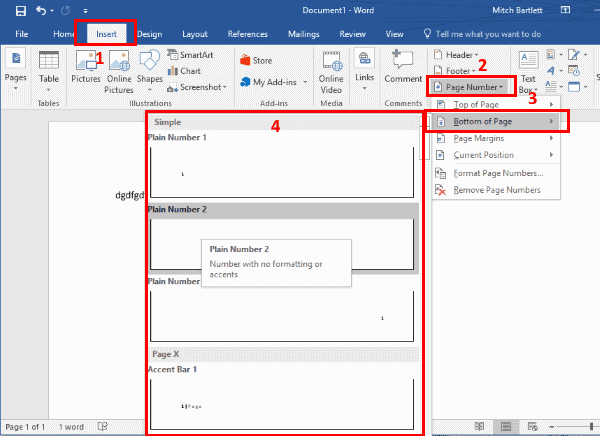
Page numbers will generate automatically and will stay consistent even when you insert or remove a page from your Word document.
Note: In Word 365, you can customize the options on each tab. If the “Page Numbers” option is missing from Word, it may have been removed. You can add it back by selecting the “Customize Quick Access” arrow, then selecting “More commands…” at the upper-left portion of the window. From there select “Quick Access Toolbar” to modify the options available. If you want to take the easy way, just select the “Reset” button.
Why are my page numbers not printing?
You may have to adjust the margins. Select “File” > “Print” > “Page Setup” (at the bottom) > “Margins“. Try setting all of the margins to “0“.
How can I start page numbering with a specific number?
Select “Page Number” > “Format Page Numbers…“. From the Page Number Format screen, select Start at then select a number you would like to start with.
How can I start page numbering on page 2?
How do I view Page Count?
Under the “Review” menu, select Word Count. Statistics will be displayed, including “Pages“.
Categories: OfficeThrough my career that spans over 20 years I have become an expert in Microsoft Systems Administration, Android, and macOS. I started this site as a technical guide for myself and it has grown into what I hope is a useful knowledgebase for everyone.